Love Is In The Air

While many people eschew Valentine’s Day for it’s commercialism, I have no problems admitting I LOVE VALENTINE’S DAY. Maybe it’s the way I choose to celebrate the day that encourages my anticipation and fanciness. I spend hours planning, decorating and yes, even crafting.  And I do not have a crafting bone anywhere in my body, or  the patience it usually requires to produce something by hand that does not look slapped together by a five year old with sticky fingers after too many sugary cinnamon hearts.

I treasure celebrating the loved ones in my life. My friends, my family, my husband; everyone close to me in my orbit. For me Valentine’s Day is not just about amorous love (XOXOX… LOVE that part though), it’s more a reminder of all the beautiful love I experience in my daily life. All the acts of kindness, generosity and grace bestowed upon me. It’s a good little reminder to pay back (or possibly forward?) goodness and thoughtfulness.

It’s also a good excuse to don brightly colored red t-shirts, pink tank tops and scarlet, lacy, under pinnings. Valentine’s Day is the perfect time to decorate the house with a huge pink tissue paper heart and invite my favorite ladies over for brunch, showering them with hugs, kisses, cinnamon marshmallow hearts, and fresh baked goodies.

Love indeed is in the air… well it is, if love is scented with lemon, and ginger… and cream cheese icing!

 
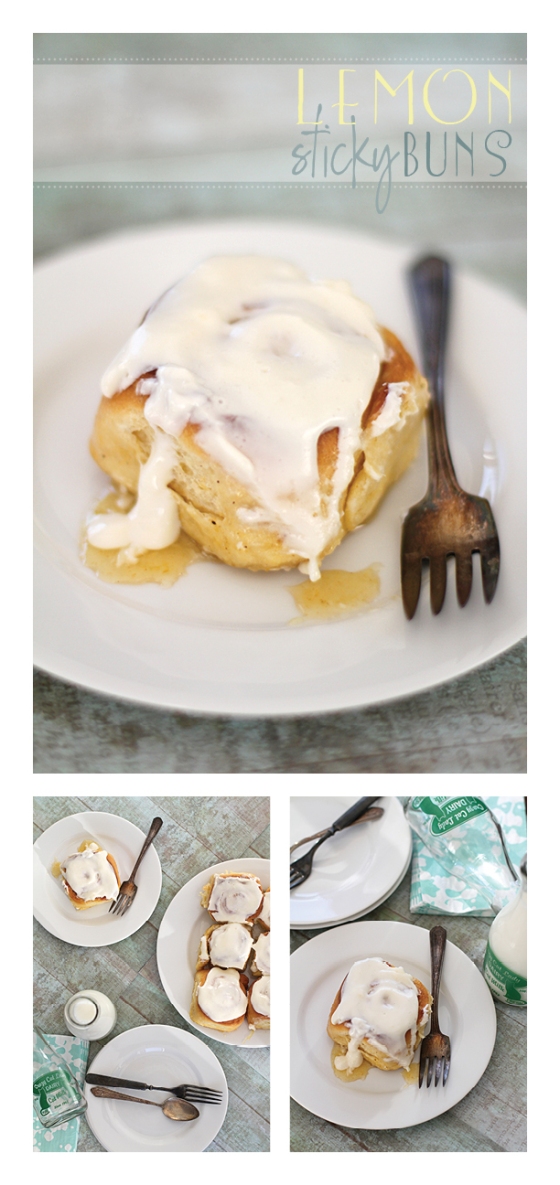
Lemon Sticky Buns with Cream Cheese Icing ( recipe source only slightly adapted from: The Kitchn)
Makes 12 large breakfast rolls

For the dough:

  • 1 envelope (0.25 ounces, or 2 1/2 teaspoons) active yeast
  • 1 cup milk, warmed to about 100°F (warm but not hot on your wrist)
  • 1/2 cup (1 stick) unsalted butter, very soft, plus 3 tablespoons more for roll assembly
  • 1/2 cup white sugar
  • 2 teaspoons vanilla extract
  • 4 1/4 cups all-purpose flour (you might not need all the flour)
  • 1/2 teaspoon salt
  • 1/2 teaspoon fresh grated nutmeg
  • Zest of two lemons
  • 2 large eggs

For the sticky lemon filling:

  • 1 cup sugar
  • 1/4 teaspoon freshly grated nutmeg
  • 1/2 teaspoon powdered ginger
  • Juice of one lemon
  • Zest of one lemon

For the lemon cream cheese glaze:

  • 4 ounces cream cheese, softened
  • 1 cup powdered sugar
  • Juice and zest of one lemon

Make the dough:

In the bowl of a stand mixer sprinkle the yeast over the warmed milk and let it sit for a 7 to 10  minutes or until foamy. With the mixer paddle, stir the softened butter, sugar, vanilla, and one cup of the flour into this milk and yeast mixture. Stir in the salt, nutmeg, and  lemon zest. Stir in the eggs and enough of the remaining flour to make a soft yet sticky dough. It works well, at this point to add in the flour about 1/2 a cup at a time. You might not need the entire amount. The dough should be really sticky.

Switch to the dough hook and knead for about 5 minutes, or until the dough is elastic and pliable. Because the dough is so soft and sticky it’s easiest if you have a stand mixer. If you don’t though, stir together the ingredients by hand, then turn the soft dough out onto a lightly floured countertop. Knead the dough by hand for 5 to 7 minutes, or until the dough is smooth, pliable, and stretchy.

Lightly grease a large bowl. Place the dough in the bowl and gently roll around until the entire ball is lightly greased. Cover the bowl loosely with plastic wrap and a towel and let the dough rise until nearly doubled — about one hour.

Make the filling:
In a small bowl, mix 1 cup sugar with the nutmeg and ginger, then work in the lemon zest with the tips of your fingers until the sugar resembles soft sand. Slowly start pouring in the lemon juice while stirring. Stop when the sugar and lemon juice form a thick, clumpy mixture like wet sand. You might not need the juice from an entire lemon.

Note: The second time I made these, I omitted the ginger, used 2/3 C sugar,  and added one heaping cup of fresh raspberries that I slightly crushed as I mixed them with the sugar. Soooooo good! And pretty for Valentine’s Day.

Assemble the rolls:
Lightly grease a 13×9-inch baking dish with baking spray or butter. On a floured surface pat or gently roll the dough out into a large yet still thick rectangle — about 10×15 inches.

Spread the dough evenly with 3 tablespoons of very soft unsalted butter, then spread the lemon-sugar mixture over top. Roll the dough up tightly, starting from the top long end. Stretch and pull the dough taut as you roll, to keep the lemon sugar firm inside. Once it’s rolled, pinch the seam shut to prevent the lemon mixture from escaping. Cut the long dough roll into 12 even rolls and place each one, open and cut side up, in the prepared baking dish. If you have any of the lemon mixture left on your counter (I certainly did!), scrape it up and pour it over the sticky rolls.

Cover the rolls with a towel and let them rise for an hour or until puffy and nearly doubled.

You can also refrigerate the rolls after this point. Cover the pan tightly with plastic wrap or a towel, and place it in the refrigerator for up to 24 hours. When you are ready to bake the rolls, remove the pan from the fridge, and let them rise/come to room temperature for a good hour before proceeding with baking.

Heat the oven to 350°F. Place the risen rolls in the oven and bake for 35 minutes or until lightly browned.

Make the glaze:
While the rolls are baking, prepare the glaze. Whip the cream cheese until light and fluffy. Add the powdered sugar. Slowly start adding the lemon juice and zest and blend until well combined and the glaze has reached your desired consistency.

Finish the rolls:
When the rolls are done, smear them with the cream cheese glaze,  Let cool for at least 10 minutes before serving, but do serve while still warm.


Notes:
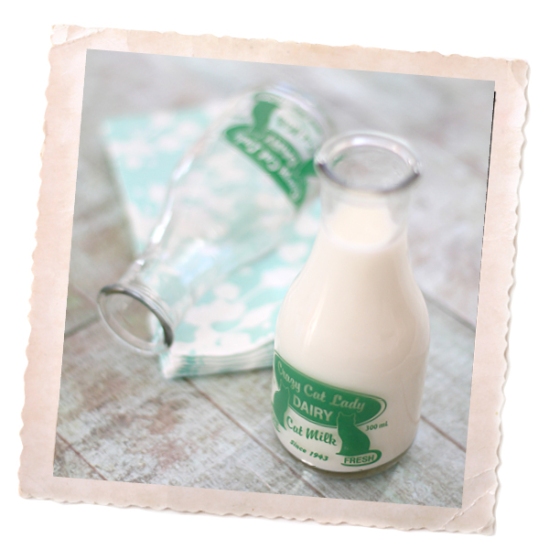
I got the cute vintage milk containers pictured as a gift.
Crazy cat lady. Pretty apt, no?

Apologies

I must apologize for my prolonged absence. I’m sorry.

Does vacating the country for several weeks constitute a forgivable excuse? Oh the sights, sounds, and smells that I feasted on. I wondered and wandered. It was a respite for my body (there were no runners in my single, under weight, checked bag), and my soul. Funny how we sometimes have to travel to a new place to discover our old selves. But more on that later. Back to my apology.

If you lived near me, I would bake a batch of muffins, cover them with my favorite tea towel while they were still warm and make my way over to your house, in hopes of exchanging the muffins for your forgiveness. But since you don’t, I’m hoping that providing you with this yummy recipe will suffice.

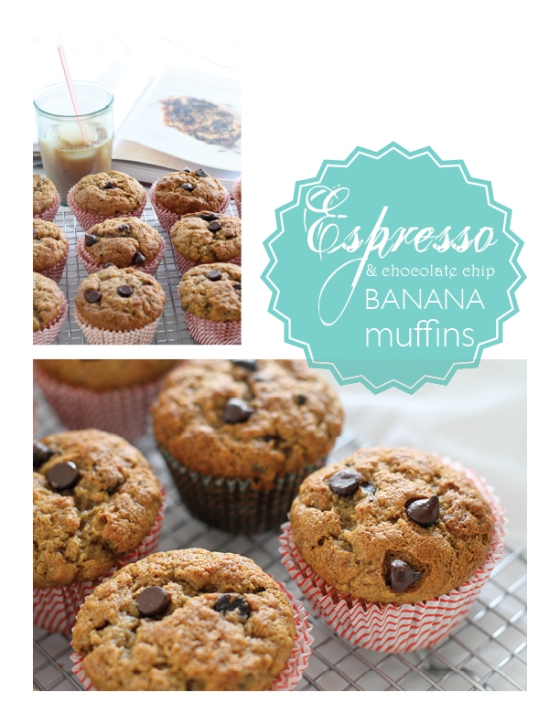
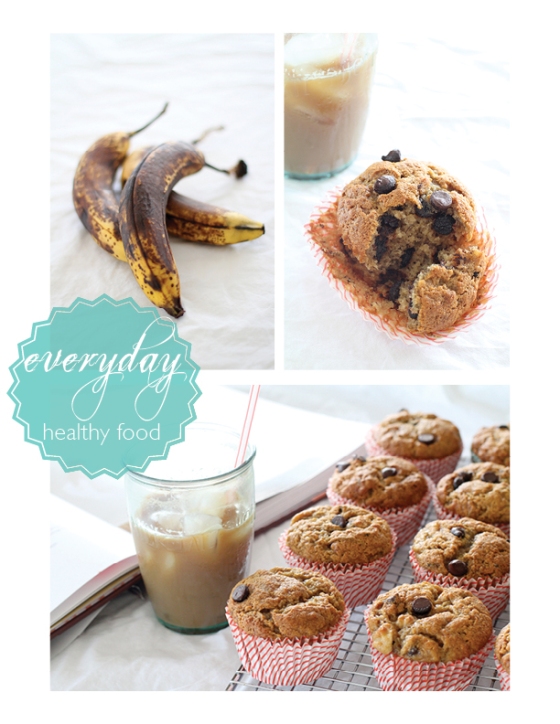
Espresso & Chocolate Chip Banana Muffins

Espresso & Chocolate Chip Banana Muffins

slightly adapted from Baked: New Frontiers in Baking, makes 12 muffins

  • 1 1/2 C mashed, VERY, VERY ripe bananas (about 4 to 5 medium sized bananas)
  • 1/2 C sugar
  • 1/4 C packed brown sugar
  • 2 Tbsp unsalted butter, melted
  • 1/4 C fat free vanilla soy milk (you can use whatever milk you have on hand)
  • 1 large egg
  • 1 Tbsp vanilla
  • 1 1/2 C unbleached flour
  • 1 slightly rounded tsp instant espresso powder
  • 1 1/2 tsp baking soda
  • 1 tsp salt
  • 3/4 C dark chocolate chips
  • Preheat your oven to 350 degrees and lightly grease, or line with paper liners, your 12 cup muffin tin.
  • Stir together the bananas, soy milk, sugars, butter, egg and vanilla.
  • In another bowl, whisk together the flour, instant espresso powder, baking soda and salt. Make a well in the middle of the dry ingredients and pour in the wet ingredients. Stir until just combined then fold in the chocolate chips.
  • Divide the batter evenly amount the 12 muffin cups.
  • Bake about 23 to 28 minutes or until a toothpick inserted into the center of a muffin comes out clean.
  • Remove from the oven and place the muffin tin on a cooling rack. Let cool for about 15 minutes then remove the muffins from the tin and continue cooling on the cooling rack.
  • Store in an airtight container about two days. If you have any left, wrap them in plastic wrap in store them in the freezer until you want them.

Notes:

  • VERY ripe bananas = BLACK bananas. Not just slightly spotted. Not just mostly spotted and mushy. The riper the bananas, the more flavor they will impart in your baking. The bananas pictured above are not ripe enough.
  • The original recipe calls for 1/2 C butter. Go ahead if you want (ie. you’re not going on a beach vacation over your Christmas break), but I found the muffins great with just 2 Tbsp of butter. The bananas will give your muffins more than enough goodness without the butter.
  • Instant espresso powder is NOT the same as ground espresso. Instant espresso powder dissolves instantly (hence the name). Ground espresso needs to be prepared in an espresso machine, but it most certainly would be great served along side the muffins.
  • If you do live near me, let me know, I just might pop by with a fresh batch of muffins!

Thankful

Thanksgiving has come and gone, that is, if you live in the great white North, but I still want to take this time to be thankful, gracious, and grateful. After all, if I publicly declare how much I love fall (impending inclement weather and hazardous road conditions forthcoming), getting older (how does one really handle simultaneous wrinkles, zits, dry patches and oily skin?), and the upcoming Christmas shopping season (angry mad crowds, the pressure of finding the “perfect gift”, and fighting over the last remaining parking spot)… it must be true. Kind of like a self fulfilling prophecy, right?

After all, fall is a beautiful time of year. The leaves are gorgeous colors of bright yellows and stunning reds. The sunlight is soft and golden. The air is cool, crisp and clean. Fall produce lends itself so well to comfort food and time spent with loved ones and family. And my personal favorite: the winds often dies down and the mornings are cool and hazy, my perfect running weather.

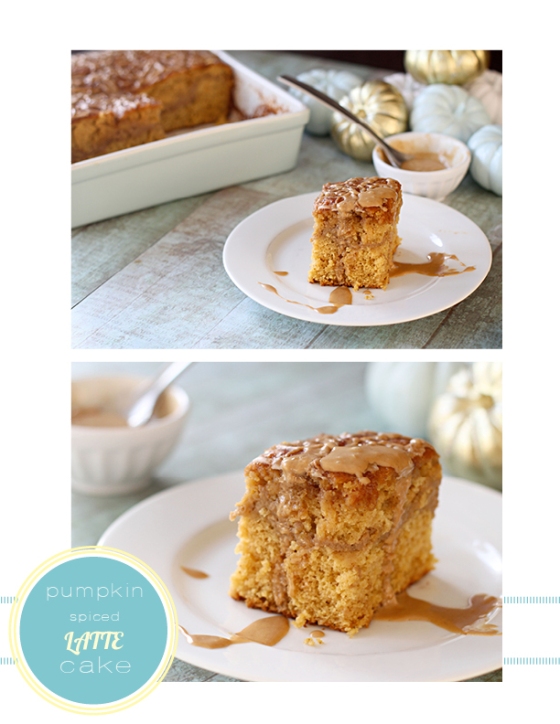
So I WILL be thankful for my family and friends. Their love and support means the world to me. And I will age with grace. I hope.  And I am grateful for all the blessings bestowed on me like the fact that I can go Christmas shopping, Starbucks spiced pumpkin latte in hand, and spoil my beautiful nieces and nephews with gifts. But for those of you who are not near a Starbucks (I am working on being grateful for  my place of residence. Working… but it’s a slow process. I’d really prefer a Cafe Artigiano’s) try this cake. It’s a pretty good second!

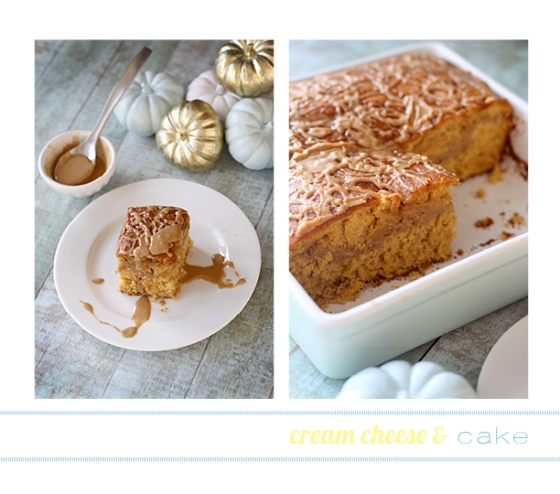
Pumpkin Spiced Latte Cake

For the Cake:

  • 3 C all purpose flour
  • 2 tsp baking powder
  • 1 tsp baking soda
  • 1 tsp pumpkin pie spice
  • 1/4 tsp salt
  • 1/4 C butter at room temperature
  • 1/4 C applesauce
  • 2 eggs at room temperature
  • 1 C granulated sugar
  • 1/2 C brown sugar
  • 1 C pumpkin puree
  • 2/3 C fat free vanilla yogurt
  • 1 tsp vanilla
For the Cream Cheese Layer:
  • 1 block low fat cream cheese at room temperature
  • 1 egg at room temperature
  • 2 tsp instant espresso powder
  • 1/2 C sugar
  • 2 Tbsp all purpose flour
  • 1 tsp vanilla
For the Glaze:
  • 1 1/2 C icing sugar
  • 1/ 2 tsp instant espresso powder
  • 1 to 2 Tbsp espresso (or strong coffee if you don’t have access to espresso)
Directions:
  • Preheat your oven t0 350 degrees and lightly grease a 9″x9″ baking dish.
  • Beat together all the ingredients for the cream cheese layer until nice and smooth.
  • Sift together the flour, baking powder, baking soda, pumpkin pie spice and salt.
  • Beat the butter and sugars until light and fluffy. Add in the eggs, one at a time, beating well after each egg, about one minute. Fold in the pumpkin, apple sauce yogurt and vanilla.
  • Gently fold in the dry ingredients.
  • Put about 2/3 of the cake mixture into your baking dish. Spoon over the cream cheese layer and smooth out using the back of the spoon until the cake is covered. Gently spoon on the remainder of the filling again, using the back of the spoon to smooth out the batter.
  • Bake at 350 degrees for about 50-55 minutes or until a toothpick inserted into the middle of the cake comes out clean.
  • Cool on a wire baking rack.
  • While your cake is cooling whisk together all the ingredients for the glaze. One the cake is cooled, drizzle the glaze on top.

Notes:

  • You may replace the 1/4 C applesauce with butter, the fat free yogurt with full fat, and the low fat cream cheese with regular cream cheese. The above is the slightly more “figure friendly” version. Because getting older is hard and your metabolism slows down. And you know what fall means? Winter. Which means WINTER VACATION. And a bikini.
  • If you want a sweeter cake, feel free to add an additional 1/4 C to 1/2 C sugar. I thought the cake was great without it and so did my husband who doesn’t always appreciate my “de-fatted” foods. This one passed the test.

Slumpiness

I recently read a Dr. Suess quote that made me giggle a little, but oh-so-accurately described my current state of mind:

And when you’re in a slump, you’re not in for much fun. Unslumping yourself is not easily done.

This last while, I’ve found myself in just that slump. And it’s been HARD fighting my way out. It hasn’t been any fun. I don’t think I’ve been any fun. I feel rendered useless and still. Not moving. Incapable of making even the slightest decisions. Just waiting.

But as the incomparable Dr. Suess also says:

You have brains in your head. You have feet in your shoes. You can steer yourself any direction you choose. You’re on your own. And you know what you know. And YOU are the guy you’ll decide where to go. 

And you know what? I DO have my own thoughts and dreams. Even a few goals. My runners are laced up, and I have so many different paths in front of me to choose from; an escape from all that waiting and staying. My issue is in actually making that decision, on where it is that I want to go. Because it is up to me. I have to decide for myself. I have to keep moving and dreaming. And planning and hoping. And while it’s not a life altering decision, it is a small step forward to get back into the kitchen and bake up a lovely birthday cake for all the fall birthdays in my family. It feels good to do something for someone else; it’s a small bit of forward momentum and who knows where it will lead? Or what the next decision is that I’ll make?

So be sure when you step. Step with care and great tact and remember that Life’s a Great Balancing Act. Just never forget to be dexterous and deft. And never mix up your right foot with your left.

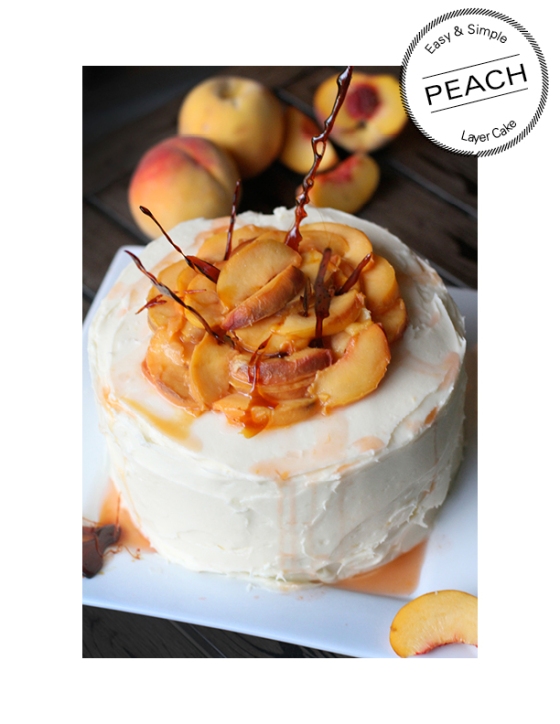
Pretty Peach Layer Cake with Burnt Sugar Shards

from Kiss The Groom

For the peaches:

  • About 6-8 large, ripe peaches
  • 2 Tbsp unslated butter
  • 1/2 C sugar (more or less depending on the ripeness of your peaches)
  • 1/2 tsp ground ginger
For the Cake:
  • 3/4 C butter
  • 1 1/2 C sugar
  • 4 eggs at room temperature
  • 3 C all purpose flour
  • 1 1/2 tsp baking powder
  • 1 1/2 tsp baking soda
  • 1/2 tsp kosher salt
  • 1 1/2 C sour cream (I used low fat)
  • 1 Tbsp vanilla extract
  • 1 1/2 C cooked peaches (see above)
For the Frosting:
  • 2  8-oz blocks of cream cheese at room temperature
  • 1 C butter at room temperature
  • 8 C icing sugar
  • 1/4 C of peach syrup (liquid leftover from cooking the peaches)
For the Burnt Sugar Shards:
  • 1 C sugar
Directions
For the Peaches: 
  • Thinly slice and pit the peaches. I left the peel on but that’s up to you.
  • Heat a large skillet to medium heat. Melt the butter then add the peaches. Sprinkle with the desired amount of sugar. Saute until nice and soft but not falling apart. Sprinkle with the ginger. Set aside.
For the Cake:
  • Preheat your oven to 350 degrees. Grease two 9″ round cake pans.
  • Cream together the butter and sugars until light and fluffy, about 5 minutes. Add in the eggs, one at a time mixing completely after each addidion, about one minute. Add in the vanilla and mix 30 seconds.
  • In a separate bowl, combine all of the dry ingredients. Mix together. Add to the butter mixture alternating with the sour cream. Please do NOT over mix at this point.
  • Fold in a good 1 1/2 C of your cooked peaches into the batter.
  • Divide the batter evenly between your two cake pans. Bake about 40 minutes or until a toothpick inserted into the middle of the cake comes out clean.
  • Cool the cakes on a baking rack for 10 minutes then invert to finish cooling.
For the Frosting:
  • This is a REALLY large recipe. You might want to make it in two batches. If you do: put one block of cream cheese, 1/2 C butter, and 4 cups of icing sugar in a bowl and mix until blended. Add in a bit of the peach syrup until your frosting is the right thickness. Repeat.
For the Burnt Sugar Shards:
  • Prepare a large baking sheet with parchment paper.
  • Put the sugar in a large saucepan. Heat over medium heat until the sugar begins to melt and brown. Do NOT stir! You can tilt the pan if you need the sugar to melt more evenly.
  • Once the sugar is all melted and has turned a dark amber color, pour it onto the parchment lined  baking sheet. It will start to harden almost immediately. When it is completely hard you can break it into shards by hitting it with a mallet or dropping the tray (but not on your hardwood floor!).
  • You can make these several days ahead and store in an air tight container.
  • Be careful! These shards can actually get pretty sharp.
To assemble the cake:
  • Make sure your cakes are level. You might have to trim the tops which is ok. It will give you a little sample to taste test.
  • Place one of the cakes on a pretty cake stand. Spread with a LOT of frosting. Top with the other cake. Give your cake a nice crumb coating of frosting then place in the fridge to stiffen up. I let mine sit in overnight.
  • Remove the cake and finish icing it. At this point you can put the cake back in the fridge or leave on the counter. It is best served at room temperature but tastes best if it has at least one day to sit and let the flavors meld.
  • JUST before serving top with the remaining cooked peaches and burnt sugar shards, then drizzle with any left over syrup.
Notes:
  • The directions seem long winded but it’s really an easy cake to make! Plus you can make it the day before you want to serve it.
  • I cooked up enough peaches for the cake batter on one day. The following day, when I served the cake to my family (ie. the taste-testing guinea pigs. Thank goodness the nieces LOVE cake!), I cooked up a bunch more for the top of the cake. I thought the peaches turn a little fugly if they sat in the fridge overnight.
  • I would never mix up my left foot with my right. Because I am very graceful.
  • All quotes from Dr. Suess’s Oh, The Places You’ll Go!

Stout Brownies

Does anyone around you, inspire less than the best in you? Make you doubt your self worth? Make you believe you’re not smart and beautiful inside and out? Perhaps a high school coach told you at 117 pounds you should lose 5 pounds, afflicting a life long battle with your self image. Or maybe an old flame once said you looked plain (and yes we blonde haired, blue eyed mennonites are far from exotic… but plain?). It could be that you just haven’t received a heart felt compliment in a very long while.

So here’s to you…

The broad shouldered, fat kneed, monkey armed, small breasted, wide hipped, saggy assed….

Short legged, knock kneed, pigeon toed, stocky or skinny, long waisted, high foreheaded, and yes… even the perfectly proportioned.

Remember blisters heal, muscles eventually recover, and friendships last a lifetime. High heels definitely have their place, but runners are more important. If you can run a mile you can run a marathon. Your sports bra needs replacing and only one person wins. Everyone else should have a kick ass time.

May you live long and enjoy dessert. You can never have enough chocolate or red wine. Never stop laughing or reading. Love and breathe deeply. Travel. Sing loudly and always dance.

Be kind to others. Be good yourself. Be true to yourself.

Be your true beautiful self.

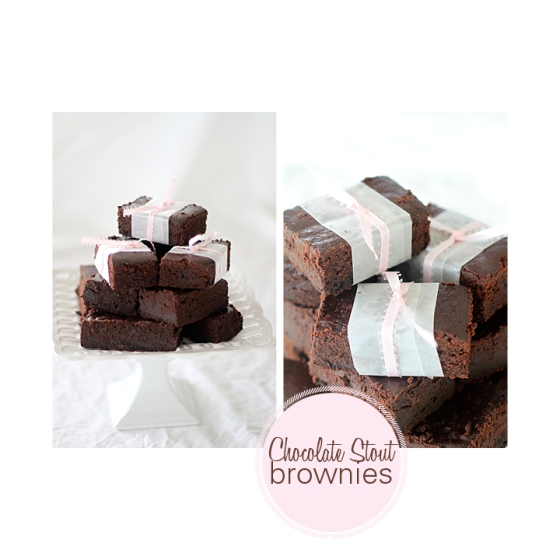
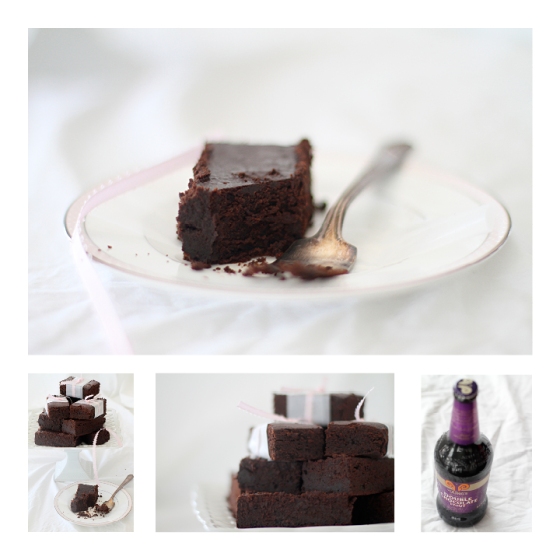
Double Chocolate Stout Brownies

  • 1 C all purpose flour
  • 2/3 C good quality cocoa powder
  • 1 Tbsp BLACK cocoa powder (if you don’t have any, just omit)
  • 1/4 tsp salt
  • 6 Tbsp unsalted butter
  • 8 oz. bittersweet chocolate
  • 3/4 C chocolate chips ( I used 1/4 C white chocolate and 1/2 C dark chocolate. I would suggest NOT using milk chocolate.)
  • 1 rounded tsp instant espresso powder
  • 4 large eggs at room temperature
  • 1 C white sugar
  • 1 1/4 C Double Chocolate Stout Beer (I’m sure and Guinness will do)
  • Preheat your oven to 375 degrees F. Line a 9″x13″ baking pan with parchment paper. Make sure two of the sides are sticking out over the pan so you can easily remove your brownies later.
  • Mix together the flour, cocoa powders and salt.
  • Melt the butter, bittersweet chocolate, chocolate chips and espresso powder over very low heat, stirring constantly. Use a double boiler if you have one. Remove from the heat.
  • In another bowl (Sorry for the amount of dishes!), beet the eggs and sugar on high speed until light and fluffy, at least 3 minutes. Add in the melted chocolate mixture and beat until combined.
  • Fold in the flour mixture. Once it’s just combined, whisk in the stout beer, by hand. Your batter might seem a bit runny for a brownie but don’t worry. It bakes up perfectly.
  • Pour into your parchment lined pan and bake for 20-25 minutes. When inserting a toothpick it should still have a few crumbs when removed from the brownies. If it doesn’t – you’ve overbaked your brownies and they won’t be fudgy; they will be more like cake. It’s best to underbake these slightly so they are more moist.
  • Let the brownies cool to room temperature on a wire cooling rack then lift out of the pan.

Notes:

  • If you like beer, you’ll be happy to know this recipe does not call for an entire bottle. Enjoy the remainder while your brownies bake up! Make sure not to include the foam in your measurement of 1-1/4 cups. Either spoon off the foam or let the beer rest until the foam subsides.
  • And always remember: you can never have to much chocolate!

Nourishment & Satisfaction

I’ve been thinking about nourishment and satisfaction lately. How the two aren’t usually concurrent. As you can plainly see, this little blog is mostly about food. Relatively healthy food (except for the cookies) that I’ve taken the time to make from scratch. But sometimes, after spending an entire day alone in the kitchen or working in front of my computer during all hours that see the sun, I’m worn out. I crave something salty and unhealthy. Or something quick and easy. It’s usually not the type of food I picture myself enjoying and I’m quite embarrassed to admit my lunch today was a handful of goldfish, a half pint of blueberries, and a double tall iced latte. Not really the nourishment my body needs but at that moment I was satisfied. For just that particular moment.

But an hour later my stomach is rumbling, I’m low on energy (why hasn’t the caffeine kicked in?), and I’m feeling lonely and little sorry for myself. Unsatisfied and undernourished.

Why don’t I put the same care into myself as I do into the food I’ve prepared for my blog? Or the same care I’ve taken on my latest photography job or print job? Or the same time and effort I expend on running?

I think it’s important that we try to take care of ourselves and others, even if we start in small, little ways like taking a lunch break and eating a healthy, well-rounded lunch. Or taking a few minutes at the end of a day, with the people we love and listening to how their day went. Maybe it’s a late evening walk, enjoying the last remnants of warm sunshine, with a friend you haven’t seen in a while. It’s about feeling more than just satisfied in that moment. It’s about finding ways to hold onto that satisfaction. It’s about nuturing and nourishment. Not just for our bodies but our souls as well.

It feels good. It feels important.

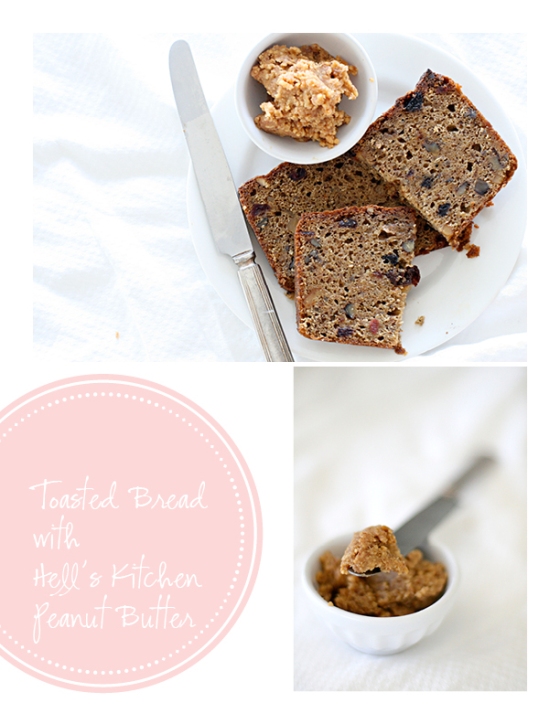
So take a deep breath, sit back, relax and enjoy a piece of Maple Bison Bread. It’s chalk full of healthy & nourishing goodies. It’s delisciously dense and dark. Toast it up with peanut butter and enjoy a leisurely weekend  morning together with the person you love.

How satisfying.

Hell’s Kitchen Maple Bison Sausage Bread

  • 10 oz. Maple-Glazed Bison Sausage (see recipe below)
  • 1 C packed dark brown sugar
  • 2/3 C granulated sugar
  • 2 large eggs
  • 2/3 C VERY strong brewed coffee
  • 2 C all purpose flour
  • 2/3 C dried currants
  • 2/3 C walnut pieces
  • 3/4 tsp baking powder
  • 3/4 tsp baking soda
  • 3/4 tsp pumpkin pie spice
  • 3/4 tsp ground ginger
  • 2 Tbsp butter, melted
  • Preheat your oven to 350 degrees. Lightly grease a large loaf pan (I used a 9″x5″ pan).
  • Place the sausage, brown sugar, sugar, eggs and coffee in a large bowl. Gently mix until the ingredients are just incorporated; about 1 minute on low speed with your stand mixer. Then turn the speed to medium and mix one more minute.
  • Add all the remaining ingredients and mix on low speed until just combined. Scrape down the sides of your bowl then mix on medium another two minutes.
  • Pour the mixture into your greased pan and bake for about 1 1/2 hours or until a toothpick inserted into the center of the loaf comes out clean.
  • Remove the loaf from the oven and let it cool to room temperature in the pan.
Maple Glazed Bison Sausage
  • 1 Lb. ground bison
  • 2/3 C dried onion ( I used about 1/2 C finely chopped fresh onion)
  • 6 Tbsp maple syrup
  • 3 medium cloves of garlic, minced
  • 2 tsp each fennel seed, fresh thyme, dried sage, and crushed red pepper
  • 1 tsp ground white pepper (black will suffice as well)
  • 1 tsp kosher salt
  • At this point, portion off 10 oz. for the bread. You can form the rest into patties and serve at your next brunch.
  • This sausage works well to make ahead and freeze.
Notes:
  • If you don’t have currants substitute any dried fruit that you really like: cranberries, cherries, etc.
  • The stronger your coffee the better. Thick like tar, and strong enough to stand your spoon upright.
  • If you cut the loaf into 16 pieces, each has about 250 calories, 7 grams of fat, 7 g protein, 2 g fiber, and 47 g of carbs (not including the peanut butter!).
  • Try toasting this bread in your cast iron skillet and serve it with peanut butter. Hell’s Kitchen peanut butter if you have it… turn on your favorite lazy Sunday morning jazz cd and sit down to enjoy with your most loved. Who knows where it might lead… pure satisfaction.

Essentially Normal

Have you ever been to your doctor (Dr. Lee and I have matching raspberry hued Uggs. It was an instant bond. Although, how can one not form an immediate connection with a strange male examining one’s lady bits.) and had a test done only to hear the results: your levels are essentially normal? Or how about this one: you have no gross abnormalities.

Does that mean, if I am essentially normal, that I am also slightly abnormal? As in slightly insane? If I have no gross abnormalities, do I have many small, insignificant abnormalities? My husband is, quite rightly, laughing as he reads this. He is “convinced” I have a negative force field around me. You know… just a little deviation in my chemical make-up. When I depress the button for my car window to roll down it goes all the way down, then promptly goes back up. Three times. When I use the keyless entry on the garage door I have to hit enter twice after punching in my code. And not just my garage door; on anyone’s keyless entry.

Most of the physical anomalies (fertility challenges aside) are easily laughed off. How can double jointed shoulders not be a fun party trick? The slightly insane part…

While also quite accurate (oh admit it, we ALL have our slightly insane tendencies), not always quite so funny.

My negative force field extends to the yoga room. The class can be full, but guaranteed there is a boatload of space around my mat. Why doesn’t anyone want to practice near me? It hurts my feelings (and no, it has nothing to do with my competitive attitude because yoga is zen and calm, as am I in the hot room). It also hurts my abnormally sensitive feelings when I make a date with a friend and they don’t follow through or bother to call. Or when I want to be included in people’s plans and I’m not.  There is part of me that can not, and will not, ask to be included, or be the first one to reach out, or the first one to make that call. I have a very significant, freakish, fear of rejection. After all, if my own busted babymaker parts have rejected me for over six years, despite all my asking, begging, and pleading, why would anyone else be any different? I expect the people I’ve let close to me, to know that about me, to support me, and to make up for my obvious short comings. Is that asking to much? Do my feelings get hurt too easily when someone close to me lets me down? Do I shut down & turtle too quickly? Does all this crazy talk make me slightly insane?

So I am crazy. I’ve put it out there. You all know it. But also know, I’d really like you to put your mat down next to mine in yoga class.

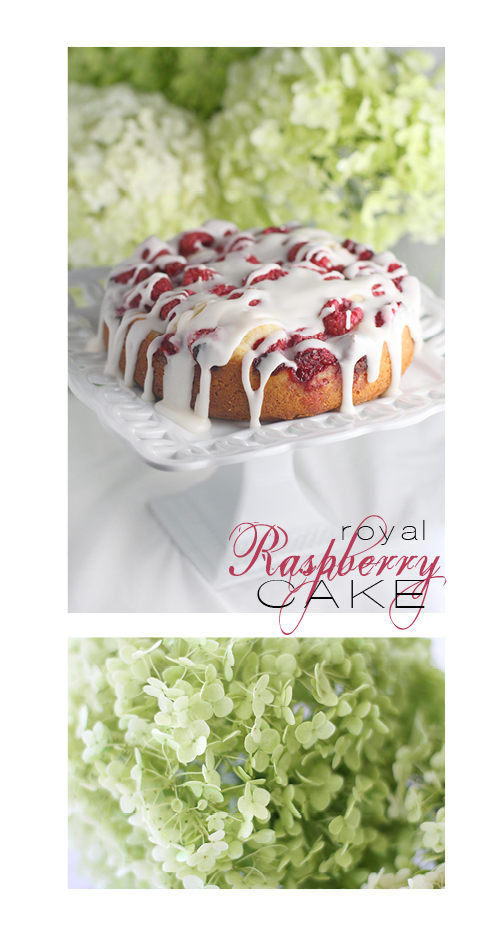
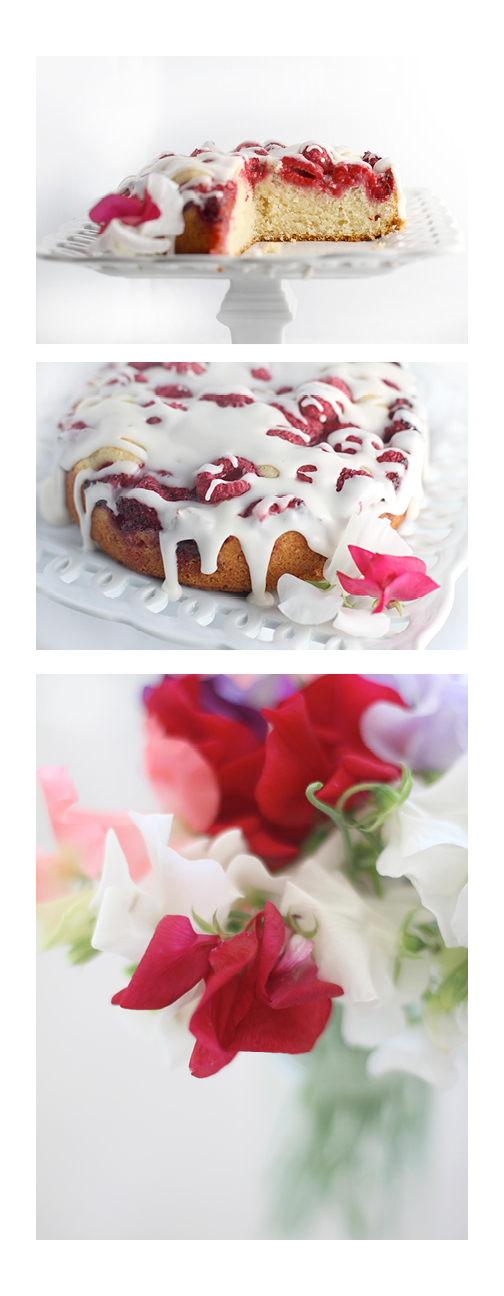
Royal Raspberry Cake

Source: my mom’s archives

  • 2 C all purpose flour
  • 1/2 tsp salt
  • 1 Tbsp baking powder
  • 1/3 C butter at room temperature
  • 1 C sugar
  • 1 egg at room temperature
  • 1 C milk at room temperature
  • 1 tsp vanilla
  • 3 to 4 C fresh raspberries
  • Preheat your oven to 350 degrees and lightly grease a 9×13 baking pan.
  • Whisk together the flour, salt, and baking powder.
  • Cream the butter and sugar until light and fluffy. Add in the egg and beat until well combined. Add in the vanilla and beat another 10 seconds.
  • Alternately mix in the flour and milk in three additions until just combined. Do not over mix.
  • Spread the cake batter in your 9×13 pan.
  • Top with the berries. I usually use a generous 4 cups.
  • Bake for 30-35 minutes until a toothpick inserted in the middle comes out clean.
  • Let cool on a wire baking rack.
  • Once the cake is cooled glaze with:
  • 1 1/2 C icing sugar
  • 2 Tbsp milk
  • 1 tsp vanilla
Notes:
  • If you use 4 cups berries, your baking time might be a little longer.
  • Even though swimsuit season is over (but only for the short time being because, according to my latest fortune cookie; I shall be traveling and coming into good fortune), here is the damage if you cut the cake into 12 generous servings: 250 calories per piece, 6 g fat, and 45 g carbs.
  • My sincerest apologies for the length between posts; but I’m back now! Summer is over, my biggest print project is safely at the printers (Watch your mailbox for the 32 page catalogue coming to you. That is, if you live in SE Manitoba and care about building materials), and life is resuming it’s normal pace.
Be kind for everyone you know is fighting a hard battle.
Plato